


Remembering which light switch controls each light in your home can be difficult sometimes, especially when three-way switches and more complicated setups are thrown in. Compound that complexity with the amazing versatility of home automation systems, and simple switches start limiting the potential to fully control the lighting environment.
By Tyler Crumpton, Makers Local 256, Huntsville, AL USA
To fight this growing complexity, I decided that I wanted a “smart” light switch that would let me know what lights in the house are currently on and allow me to turn any light on or off without having to figure out what switch goes where. It needed to be custom-fit to my home, yet flexible enough to be useful if the number of lights are changed, lamps are added, or if someone else wants their own switch in their own home.
There were not any solutions that fit my needs, at a low enough cost, so I turned to my trusty Raspberry Pi (RPi) single-board computer to help me make my own smart switch.
Since RPi has USB ports and general-purpose input/output (GPIO) pins, it could be used to control ZWave, Zigbee, or Wi-Fi smart lights using a USB dongle or to control some LED indicators for debugging and testing without having to run around the house to check if lights are turning on or off.
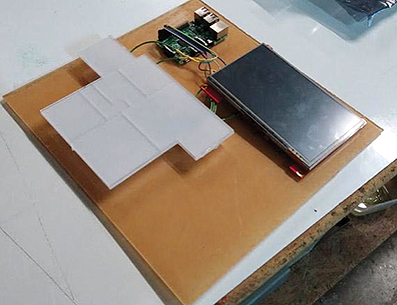
Since having a simple LED home lighting “simulator” would be extremely helpful in developing a smart switch application, I went down to the local makerspace, Makers Local 256 in Huntsville, AL and started creating a vector image of the house floorplan. This floorplan was then laser cut from a few sheets of acrylic plastic which were glued together afterward.
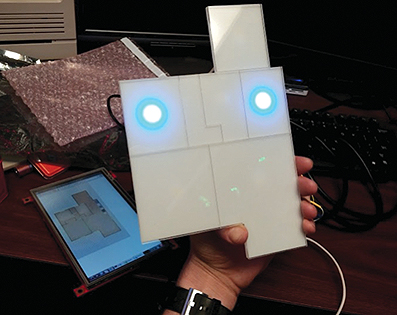
LED lights were then glued to the back of the floorplan, one LED in each room, and wired up to the GPIO pins on the Raspberry Pi. Using a small Python script, I was able to turn each room’s LED on or off with a command.
With the simulator complete, I began working on the switch interface. I decided that the easiest and quickest way to turn a room’s lights on was to just tap on a room in a floorplan, since touchscreens have become second-nature to most of us. I wanted the floorplan interface to be available from a computer, smartphone, or even a dedicated touchscreen device mounted on a wall where a light switch would normally be.
Using the Tornado Python web framework and a little bit of Java script and HTML, I wrote a tiny webserver that displayed the floorplan of the house and let you click on each room to change the light. The room would glow when the light was turned on so that I could tell what the state of each room’s lights was in. The server sent a command to the simulator each time a light was changed, so each tap on a room lit up or turned off the corresponding LED on the simulator.
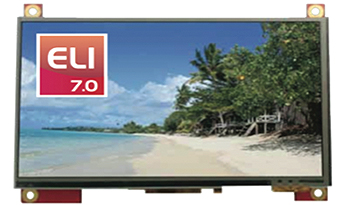
The web application worked perfectly on a computer or smartphone, but I still needed a dedicated replacement for the old light switches on the walls. Since the Raspberry Pi that ran the web server has an HDMI output and a spare USB port, I decided to use the ELI70-CR 7.0” embedded color touchscreen from Future Designs, Inc. to display the web application.
The ELI, which stands for Easy LCD Interface, is an off the shelf embedded touch screen LCD solution for use with an SBC like the RPi. The screen required no extra configuration other than switching to portrait mode and I set the Raspberry Pi to jump straight into the floorplan controller whenever it boots.
I have not yet decided on a wireless technology for controlling lights in my house, so the next step is to install ZWave, Zigbee, or Wi-Fi lights or light controllers. There are many projects for ZWave that have Python mappings, so making the web server control those devices via a ZWave USB dongle would only require a few lines of code.
Changing the floorplan for use with someone else’s house is as simple as drawing up the plan and defining the rooms. There are so many options that can be added, including dimming control, color control with the Phillips Hue, and energy conservation by scheduling lights to turn off at certain times.
Overall, I was able to create a custom, personal light controller for my home using only a Raspberry Pi, the FDI ELI70-CR touchscreen, and a USB dongle for ZWave, Zigbee, or Wi-Fi.
It took less than a day to get most of it working, so expanding upon the initial design should be quick and fun, and hopefully make my home just a little bit easier to use and a whole lot cooler.
Find more information:
ELI (Easy LCD Interface) from FDI:
http://www.easylcdinterface.com
Makers Local 256:
https://256.makerslocal.org/